Grilling Tools | Grill Prep | Grilling Beef: Beef Steak, Beef Roast | Grilling Chicken: Chicken Breasts, Leg Quarters and Half Chickens, Whole Chicken | Grilling Pork: Pork Shoulder/Butt, Pork Roasts/Tenderloin, Pork Chops | Grilling Fish
Some would say that grilling is an art. We at Joe’s tend to disagree; anyone can have a great grilled meal if they follow our simple guidelines. Although certainly a bit of trial and error will result in steaks, chops and fish you like best!
ESSENTIAL GRILL TOOLS: There are a few tools you’ll need to ensure your grilling success. Notice what’s missing? A grilling fork! Throw yours out, it pierces your meat and serves no purpose that can’t be done with the tools below. We recommend you NOT buy a “grilling tool set” as they never seem to have just what is needed and often contain forks, bladed tongs or other undesirables!
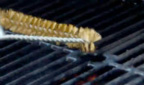
Grill Brush – Essential for cleaning your grill on a per use basis. Choose one without a wooden handle (contamination and you can’t leave it outside in wet weather). Make sure the handle is long enough to keep your hands from feeling the heat if you are cleaning a warm or hot grill. Choose bristles that won’t flatten after a few uses. Finally don’t spend a fortune on fancy brushes or brushes with scrape blades. The scrape blade is not needed if you clean after every grilling and it can be hard on your grill surface. Expensive brushes get replaced just as often as less expensive ones so save your money. Here’s an example of an economical brush that fits the bill:

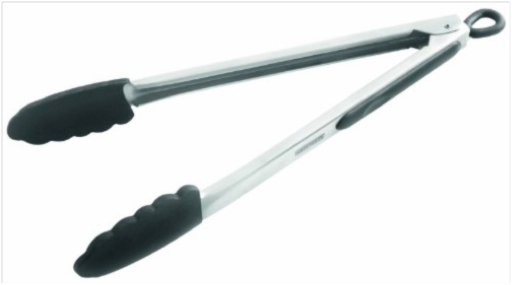
Grill Tongs – A must for turning and moving food around the grilling surface. Here is where spending a bit of money gets you a superior product. Again, avoid wooden handles and buy tongs with longer handles to keep your hands away from the grills heat. We also recommend you avoid the blade type tongs without solid gripping ends. Make sure your tongs are sturdy and can withstand the rigors of grabbing onto and moving a whole chicken or a large roast. Good grill tongs can last you a life time if you clean them after every use and store them inside. We’ve had our best luck in finding the right product at local restaurant supply stores. Here is an example of tongs that we like:

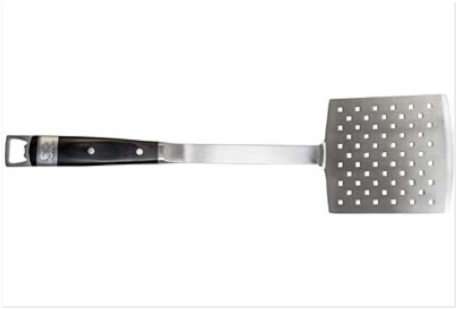
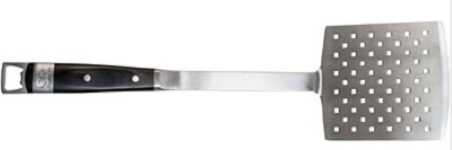
Grill Spatula – A must for loosening food from the grill, and turning food with the aid of your grill tongs. Yes, avoid wooden handles again and stick with a longer handled version. Choose a model that is sturdy, strong and meant to last a lifetime. We found that flexible head spatulas don’t stand up to the rigors of grilling and the pressure of pushing at different angles. A wider blade will allow you to turn fish easier, but too wide and your blade will get in the way on a crowded grill. Here is an example of a grilling spatula we like (the bottle opener at the end of the handle is a bonus for beer drinkers):

Grilling Thermometers – Plain and simple the most important tools you can buy. If you want the best grilling results you need to stop cooking by time (use it as a guideline only) and start cooking by finished temperature. We recommend you buy two different types of thermometers. 1) Instant Read Thermometer – analog models are durable, safe, and cheap but they take 15 seconds or more to read the temperature and they require calibration (buy placing in ice water or boiling water then turning the nut on the back of the thermometer) a few times a year, digital models are quick and effective and require you to change the battery every year or two but cost more and are prone to breakage. Either one is an excellent choice but we’re keen on the digital brands for their ease of use, finally make sure your thermometer is NSF (food safety) certified:

Probe Thermometer with Alarm – these types of thermometers are handy for larger pieces of meat, steaks, roasts or whole birds. In general you use these when you are “baking” meat on your grill (indirect cooking method described below). The thermometer is made up of a probe that is inserted into the meat with a thin wire cord leading back to a base unit. The base unit measures the internal temperature of the meat, and sets off an alarm when it reaches the temperature you set. The new high tech models are slick and instead of hooking up with a base unit they attach to a wireless transmitter that sends the temperature to a base unit you carry with you. As with the older technology, it sounds an alarm (“Dave, your meat is done”) when the meat reaches the temperature threshold you set.

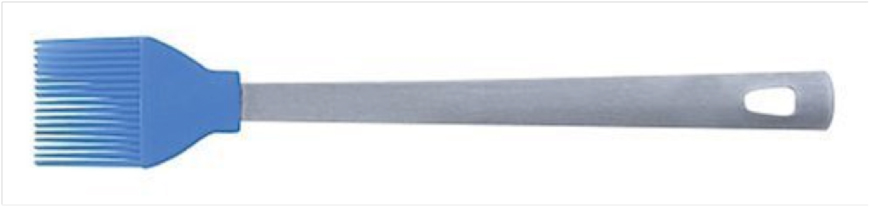
Silicone Grill Brush – This is a super tool. It bastes meats and distributes sauces flawlessly, won’t get contaminated or lose hairs, and makes clean up an absolute breeze. They are heat resistant so you need not worry about melting them at normal grill temps. They are certainly more expensive than their synthetic brush counterparts but worth every penny. Again, choose one with a longer non-wood handle.

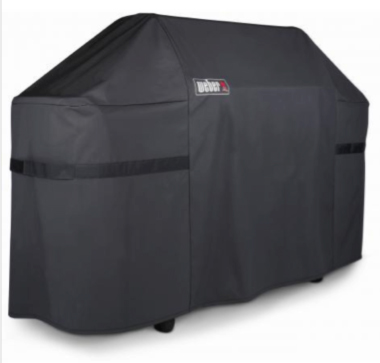
Grill Cover – The best advice we can give to a home griller is buy a cheaper grill and spend the money you saved on a superior grill cover. Covers keep your grill looking great, protect it from the elements, help stop rust, help stop spiders from clogging gas tubes, etc, etc. A good weather resistant cover is expensive but will last 6 seasons or more outside and extend your grill life by twice that, Joe still cooks on the same gas grill he purchased in 1998. He has gone through two covers, replaced the ignition plug (2005), replaced his grates (2007) and burner covers (2011) and that’s it. It sure beats buying a new grill.

GRILL PREP: Before you can grill a great steak, chop, or chicken breast you’ll need to prepare the grill you will be using.
Annual Cleaning – A clean grill is essential to producing superior grilling results. A dirty grill will cause food to stick, impart unwanted flavors to your food, and shorten the life of your grill. Start your grilling season off with an annual cleaning. There are many YouTube videos available on annual grill cleaning, here’s a link to one from Lowe’s:
http://www.youtube.com/watch?v=oHP-drpcfRI
Clean after each use – After your annual cleaning, keeping your grill surface clean is easy. After every use of your grill “burn off’ any residues left behind from grilling your meal. On a gas grill simply turn all your burners to high and shut the lid, allow the grill to run for 15 minutes,then shut off the grill and brush off the now charred residue with your grill brush. You can do the same thing with a charcoal grill by knocking down the coals and placing your lid on the grill, allow the grill to burn for 25 minutes, and then brush off the ashes with your grill brush. WARNING: clean means rough debris and ash is removed, it does not mean cleaned to the bare metal. Bare metal rusts and bare stainless pits and corrodes. Leaving a thin coat of “black” or “dark oil” on your grates protects against corrosion and seasons your grill like you would a fine cast iron pan.

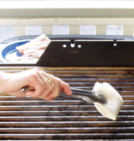
Oil the grates each use – If you follow the above steps after grilling, the next time you use the grill your prep will be a cinch. First, lightly brush the surface of your grill with your grill brush to remove any debris you missed after your last grilling. Take four sheets of paper towels stacked on each other and fold them into a tight packet or “pad”, dip the pad in canola, sunflower, rice bran, or olive oil and using your grill tongs lightly wipe the oil evenly over your grill. WARNING: don’t use too much oil, you want the food to not stick, not start a fire from excess oil!

Grilling Methods – It’s important you understand the difference between Direct and Indirect Grilling methods. It’s really pretty straightforward, Direct Grilling means you place the meat directly over the heat source be it hot coals, or low/med/high gas burners. Indirect Grilling means you build up coals on only one side of a charcoal grill, or heat only certain portions of a gas grill (left/ right, or front/middle/back), then place the meat over the “off” side or that side lacking direct heat. Typically you use Direct Grilling on its own, or in combination with Indirect Grilling to create best results.
GRILLING BEEF: The first step in grilling beef is choosing the right cuts for the right reasons. Obviously you count on Joe’s to help you make the right choices for different occasions. There is really no substitute for the years of experience our staff brings to the table in helping you make best choices given your occasion and parameters. For in depth analysis of each cut and pictures click here: (insert link).
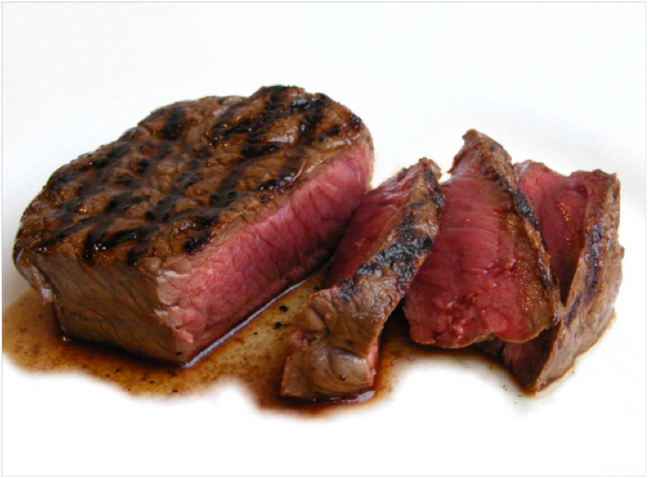
Beef Steak – There are six simple steps to grilling a great steak. You can use this method on just about every steak with equal success.
- Season your meat well – Using your cutting board as a base, apply a bit of Extra Virgin Olive Oil (EVOO) to your steak. Rub the oil all around the steak and its edges, a little goes a long way. Season your meat with your favorite steak rub, or simply rub in an ample amount of kosher salt and freshly ground cracked black pepper. If you are in a hurry a light sprinkle of garlic powder adds additional flavor but we prefer using a micro-grater to apply some fresh grated garlic or shallot to each side. Place your steak on a plate and cover with film wrap.
- Let your steak come to room temperature – Take your covered steak plate and set it on the counter for a few hours. Don’t worry, the seasoning won’t allow enough bacteria to grow quickly enough to make you sick. Bringing you steak to room temperature is essential as cooking a cold steak poses “heat potential” problems that causes your steak to be pink on the inside and well done on the outside instead of a solid doneness throughout.
- Sear your steak using Direct Grilling – For cuts equal to or less than 1 ½ inches thick sear each side for 1 minute each on high direct heat, cuts greater than 1 ½ inches thick sear for 1 ½ minutes per side on high direct heat.
- Move to Indirect Grilling – Move your steak to the “off” side of the grill and turn your temperature down to medium on the “on” side of your grill, if using charcoal move your steak to the side without coals and change your vents to decrease the heat from your coals.
- Pull your steak using internal temperature – Turning only twice, continue grilling the steak on using Indirect Grilling. Using your instant read thermometer to judge, grill until the internal temperature of the your steak is:125° F – medium rare
130° F – medium
135° F – medium/well
140° F – well - Let your steak rest for 5 minutes – Pull your steak from the grill and place it on a plate to rest for 5 minutes. Allowing the steak to rest returns to the center of the steak, the juices that were expanded and pushed to the edges of steak during cooking. The resulting end internal temperature will be 5° F higher than the “pull” temperature listed above.

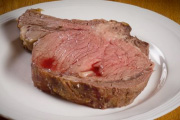
Beef Roast – The same six steps used for great steak grilling can be used for superior roasts as well, with some minor modifications.
- Season your meat well – Using your cutting board as a base, apply a bit of Extra Virgin Olive Oil (EVOO) to your roast. Rub the oil all around the roast and its edges, a little goes a long way. Season your roast with your favorite roast rub, or simply rub in an ample amount of kosher salt and freshly ground cracked black pepper. Using a sharp knife cut multiple slits into the meat side of the roast (not the fat cap) about ½ inch long and ½ in deep. Thinly slice peeled fresh garlic and insert the thin slices into the slits on the roast. Place your roast on a plate and cover with film wrap.
- Let your roast come to room temperature – Even more important for a roast than a steak (see above). Depending on the roasts size this may take several hours.
- Sear your roast using Direct Grilling – Sear the roast 1 ½ minutes per side on high direct heat (it may take three turns to completely cover the roast) then sear the roasts ends for 1 minute each on high direct heat.
- Move to Indirect Grilling – Move your roast to the “off” side of the grill and turn your temperature down to medium/low on the “on” side of your grill, if using charcoal move your roast to the side without coals and change your vents to decrease the heat from your coals.
- Pull your roast using internal temperature – Leaving the fat cap up, continue grilling the roast using Indirect Grilling, you do not need to turn the roast. Insert your probe thermometer through the fat cap and half way into the roast. Set the temperature alert to desire doneness listed below or continue to grill until an instant read thermometer reads the following for the roasts internal to temperature:125° F – medium rare
130° F – medium
135° F – medium/well
140° F – well - Let your steak rest for 5 minutes – Pull your steak from the grill and place it on a plate to rest for 5 minutes. Allowing the steak to rest returns to the center of the steak, the juices that were expanded and pushed to the edges of steak during cooking. The resulting end internal temperature will be 5° F higher than the “pull” temperature listed above.

GRILLING CHICKEN: Grilling chicken can be a bit frustrating as we all dislike dry chicken but fear eating chicken that has not been cooked enough. The general rule on chicken is to remember that Whole Chickens and Chicken Parts cook differently than Chicken Breasts. Here’s our take on perfect chicken grilling.
Chicken Preparation – Remember that anything that raw chicken touches, your counter your hands, sinks, should be completely washed with soap and water after use. Try and limit your chicken prep area to one section of your kitchen and have all the seasonings you need at hand so you’re not cross contaminating the handles of your appliances or kitchen cabinets. Always rinse your chicken in cold water and then pat dry with a paper towel.
Chicken Seasoning – Be it marinade, rubs, herbs, stuffing, or just plain kosher salt and EVOO seasoning your chicken is a great way to add flavors and enhance recipes. We recommend that you avoid rubs or marinades with sugar as it tends to burn on the grill. If you are going to baste your bird or add BBQ sauce, and your basting liquid or sauce contains sugar, apply the basting liquid or sauce near the very end of grilling.
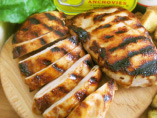
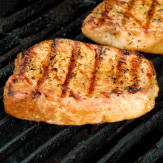
Grilling Chicken Breasts – The method for grilling chicken breasts varies depending on if you are using Boneless Skinless Breasts or Bone-in Breasts.
Bone-in Breasts: When grilling breasts with the skin on, remember that the fat content will cause more flare-ups. Sear bone-in chicken breasts for about 4 minutes per side on direct medium heat and then move to indirect low heat and continue to grill for 18-20 more minutes until the breasts reach an internal temperature of 160° F
Boneless Skinless Breasts: Boneless skinless chicken breasts should be cooked over medium high heat. They will be cooked in about 10-12 minutes, turning once every 4 minutes. Boneless, skinless chicken breast should be cooked until an internal temperature of 160° F is reached.

Grilling Chicken Leg Quarters and Half Chickens – Grilled chicken leg quarters make an impressive presentation, as do half chickens. Grill 1 minute on each side over direct medium heat. Then cook about 30 to minutes using indirect medium heat turning every 5 minutes. Quarters and halves should reach an internal temperature of 165° F in the center of the thigh.

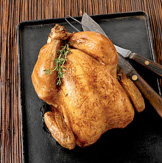
Grilling Whole Chickens – Maybe the easiest of all to grill, doing a whole chicken on the grill is semi-foolproof. Use the Indirect grilling method such that half your grill is heated to medium and the other half with no direct heat. Place your washed and seasoned chicken breast side up on the “off” side of your grill. After 30 minutes turn the chicken over and continue to cook indirectly for 30 more minutes. Resist the urge to peak as you don’t want to lose heat as the chicken cooks. Turn the chicken back to breast side up and using an instant read thermometer cook the chicken this way until it reaches an internal temperature of 165° F when measured in the center of the thigh (don’t touch any bone with our thermometer!).

GRILLING PORK: Pork has had quite a varying reputation through the years. In the mid-20th century, most pork had to be cooked well done because of the fear of trichinosis. But today pork is fed and raised differently and the meat is safe to eat when cooked properly, with no fear of trichinosis. If the juices run very light pink, the pork is done. The #1 problem with grilling pork is overcooking the pork. Remember, SLIGHTLY PINK PORK IS DONE PORK!
Commercial hogs don’t move around as much as cattle do, so the muscles don’t have to work as hard and don’t use as much oxygen. Less oxygen means less myoglobin, what gives meat it’s read color, so the meat is a lighter color. All natural hogs move around in the field and walk about the land, so their meat is darker red. Pound for pound, pork has more nutrients than chicken. Of course, being lean, it’s more difficult to cook pork so it stays tender and juicy.
AVOID BUYING ENHANCED INJECTED PORK! At Joe’s that’s not a problem, but if you’re shopping elsewhere make sure your pork has not been injected with saline, saltwater, or anything else. It actually steams your pork when cooking and if using low and slow methods can make your pork drier. It also gives your pork a salty or “hammy” taste.
Here’s our take on grilling perfect pork:
Pork Seasoning – Pork lends itself to a broader range of seasoning than beef. It does very well with herbs such as rosemary, thyme, sage, mustard seed, and herbs du Provence. It also lends itself well to more traditional soy based meat marinades and even the universal Italian Dressing. Depending on if you’re in the BBQ mood, it also does excellent with a wide array of “rubs” made by combining coarse salt, cumin, paprika, chili powder, brown sugar, etc. If you are using BBQ sauce make sure you add it at the end of your grilling time, or you will burn the sauce onto your pork!
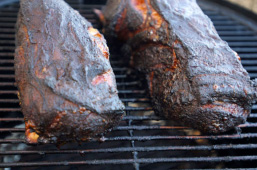
Pork Shoulder/Pork Butt – Nothing is quite as easy or tasty as slow grilled pork shoulder/butt ready to “pull” for sandwiches. Take your pork shoulder and cut away the fat cap and any pockets of external fat. You are going to cut off the fat at the end of grilling anyway so why not do it now? Unlike a beef brisket, pork shoulder is self -basting and removing the external fat won’t dry out your meat. Instead, it will allow you to expose more meat to the rub, and provide more flavorful dark outside meat called “bark” that people enjoy so much. We like to rub ours with our favorite dark mustard, followed by a good helping of our favorite BBQ rub. When we’re done we set wrap it in plastic wrap and put it in the fridge. Prepare your grill for Indirect heat such that you can maintain a temperature of 225-235 degrees. Unlike other meats, it’s OK to put cold pork on the grill so go ahead and take your shoulder straight from the fridge to your grill (removing the wrap of course!). Basically that’s it. Your shoulder will stay in on the indirect side of your grill until it reaches an internal temperature of 190 degrees (warning if you meat seems to “plateau” at 170 degrees or so, don’t worry, leave it and it will get to 190 degrees, have faith!). It needs to get that hot so that the collagen in the pork converts to gelatin. In terms of cooking times, plan on grilling your pork for about 1.5 to 2 hours per trimmed pound of meat. If you want to turn your pork or baste it (optional and not necessary but the pork will cook more evenly and the bark will soften a bit) take your total cooking time and baste/turn at ¼, ½, and ¾ of the total time. Remove your shoulder from the grill and allow it to rest lightly covered with foil for 30 minutes then pull the meat into strips with your hands or two forks to use for sandwiches!

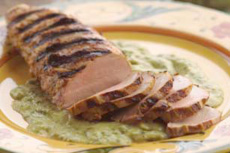
Pork Loin Roasts or Pork Tenderloin Roasts – It does not matter if your pork loin roast is boneless or bone-in and frenched, the methods for grilling are identical. Season, rub, or marinate your roast as you wish, then sear it on all sides using Direct heat on a 400 degree grill. Then reset your grill to indirect medium/low cooking (medium /low on one side or piled coals on one side, the other side off or no coals). Place the seared pork on the Indirect side, turning just one, but cooking until the roast reaches an internal temperature of 150 degrees. Remove your pork from the grill and let it rest for 10 minutes before cutting.

Pork Chops – Once again, boneless or bone-in methods are the same. But it does matter if your chops are thin or thick, as the methods are different. Thin Chops – Thin chops should be grilled hot and fast. Don’t step away from your grill, thinner pork chops will cook fast. Preheat your grill to as hot a temperature as it will go. Place the chops on the grill and close the lid for 1 minute. Open the lid and rotate the chops 45 degrees without flipping. Close the lid for another minute. Flip the chops over and close the lid again. After a minute rotate the chops 45 degrees and finish them off. With a hot grill and thin chops you will finished them in about 4-5 minutes. Thick Chops – Thick chops need a slower heat to get them cooked without drying them out. Preheat your grill as high as it will go. Put the chops on the grill and close the lid. After one minute open the grill and flip the chops. Close the lid for one minute. Now turn down the heat on your grill to medium (or move the chops to the cooler side of your charcoal grill). Rotate the chops to get your cross hatch marks and let them cook for about 3 more minutes with the lid down. After this time flip the chops over and continue cooking for about 4 more minutes. The finished temperature of your pork chops should be about 150 degrees. Thin chops need no resting time, but you will want to let thick chops rest for 5 minutes or so before eating.

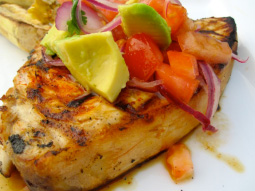
GRILLING FISH: The number one question we get asked at Joe’s Fishmarket is “how do we grill fish”? Fish grilling can be intimidating as you want to make sure it’s done, don’t want to dry out the fish, and are fearful of your fish falling apart on the grill. Fear no more, grilling fish is easy but you just need to be prepared, so here are our tips for grilling great fish:

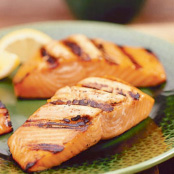
Choose the right fish type – The fish to avoid are thin flaky fillets that are sold skinless like haddock, sole, flounder, sable, and thinner tilapia. These fish are likely to fall through the grill. All other fish types can be used for grilling. Salmon, Tuna, seabass, swordfish, and small whole fish like red snapper, trout, and branzino are particularly delicious grilled.
Preheat the grill to high. You should be able to hold your hand 4 inches above the grill no longer than 3-4 seconds.
Brush the grill with oil right before adding the fish. Pick up a wad of paper towel with tongs, dip it in oil, and brush the preheated grill right before adding the fish. Forget cooking sprays. Oil works even better since it can be applied directly to the grill and not only to the fish.

Do not put sweet or wet ingredients on fish before grilling unless grilling dense fish like swordfish and tuna. The best way to prepare fish for the grill is also the simplest – salt, pepper, and a little oil. No lemon juice. It’s best to squirt if over the fish after grilling.
Do not remove the skin when grilling. Not only does it keep your fish together, it turns crispy and incredibly delicious (not to mention good for you with all those omega-3 fatty acids). Dense fish like swordfish are an exception. Their skin is too tough to eat, so it’s best to remove it.
Grill on the skin side first. If you will encounter any sticking, it will likely be on the flesh side, so grilling on the skin first allows you to keep your grill clean as long as possible. Another reason to grill on the skin side first is to prevent fillets from curling up. Fillets of some fish, like red snapper and bass, have a tendency to do that, resulting in uneven grilling and rubbery skin. Once you place the fish on the grill, close your grill and let it be until you are ready to turn it. The more you tinker with the fish, the higher are the chances of tearing its skin.
Turn the fish with a fork. Using a spatula will tear skin when you slip it under the fillet. To avoid this pitfall, slip the tins of a fork between the grill grates and gently push up on the fish. Do it in couple of places until the grill lets go of the fish. Do not try to lift the fish in the air and flip onto the other side. Instead turn it onto empty grilling space next to it, like turning a page.
Err on the side of undercooking. Grilling can easily dry out the fish. Estimate 8 minutes per inch of thickness for steaks and fillets and 10 minutes for whole fish. Start checking for doneness 2 minutes before the estimated time. To check a fillet, pretend it’s a book lying open on its face with the skin as its cover. Fold it in half with a fork as if folding a book. Don’t worry, the skin will keep it together and no one will know it’s “broken”. As soon as the fillet breaks, remove it off the heat. Dense fish like swordfish do not break no matter how cooked they are. To test them for doneness, cut into them with a knife halfway and look inside – they should still be a tad translucent when you remove them off the heat even if you prefer your fish well-done. To check whole fish, dig into its thickest part with a fork. If the flesh looks opaque, the fish is done.
Remove the fish with a fork and a spatula. To remove the fish from the grill, dislodge it with a fork like you do when turning it. Then lift one side of fillet or whole fish barely off the grill, slip a spatula underneath, and lift the fish off the grill.
Glaze only after a brief sear on both sides. If you want to cover your fish with a glaze or a sauce, first grill it plain on very high heat for 2 minutes per side. Then turn down the heat to the lowest setting, brush with glaze and continue cooking on both sides until done.
