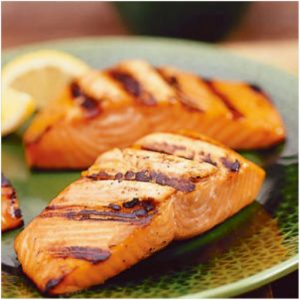
 The number one question we get asked at Joe’s Fishmarket is “how do we grill fish”? Fish grilling can be intimidating as you want to make sure it’s done, don’t want to dry out the fish, and are fearful of your fish falling apart on the grill. Fear no more, grilling fish is easy but you just need to be prepared, so here are our tips for grilling great fish:
Choose the right fish type – The fish to avoid are thin flaky fillets that are sold skinless like haddock, sole, flounder, sable, and thinner tilapia. These fish are likely to fall through the grill. All other fish types can be used for grilling. Salmon, Tuna, seabass, swordfish, and small whole fish like red snapper, trout, and branzino are particularly delicious grilled.
Prepare the Grill
Preheat the grill to high. You should be able to hold your hand 4 inches above the grill no longer than 3-4 seconds.
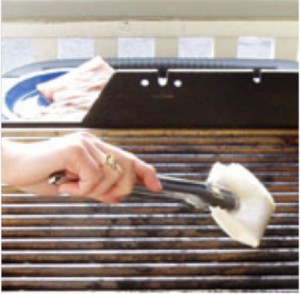
 Brush the grill with oil right before adding the fish. Pick up a wad of paper towel with tongs, dip it in oil, and brush the preheated grill right before adding the fish. Forget cooking sprays. Oil works even better since it can be applied directly to the grill and not only to the fish.
Do's and Don'ts
Do not put sweet or wet ingredients on fish before grilling unless grilling dense fish like swordfish and tuna. The best way to prepare fish for the grill is also the simplest – salt, pepper, and a little oil. No lemon juice. It's best to squirt if over the fish after grilling.
Do not remove the skin when grilling. Not only does it keep your fish together, it turns crispy and incredibly delicious (not to mention good for you with all those omega-3 fatty acids). Dense fish like swordfish are an exception. Their skin is too tough to eat, so it's best to remove it.
Grill on the skin side first. If you will encounter any sticking, it will likely be on the flesh side, so grilling on the skin first allows you to keep your grill clean as long as possible. Another reason to grill on the skin side first is to prevent fillets from curling up. Fillets of some fish, like red snapper and bass, have a tendency to do that, resulting in uneven grilling and rubbery skin. Once you place the fish on the grill, close your grill and let it be until you are ready to turn it. The more you tinker with the fish, the higher are the chances of tearing its skin.
Turn the fish with a fork. Using a spatula will tear skin when you slip it under the fillet. To avoid this pitfall, slip the tins of a fork between the grill grates and gently push up on the fish. Do it in couple of places until the grill lets go of the fish. Do not try to lift the fish in the air and flip onto the other side. Instead turn it onto empty grilling space next to it, like turning a page.
Err on the side of undercooking. Grilling can easily dry out the fish. Estimate 8 minutes per inch of thickness for steaks and fillets and 10 minutes for whole fish. Start checking for doneness 2 minutes before the estimated time. To check a fillet, pretend it's a book lying open on its face with the skin as its cover. Fold it in half with a fork as if folding a book. Don't worry, the skin will keep it together and no one will know it's “broken”. As soon as the fillet breaks, remove it off the heat. Dense fish like swordfish do not break no matter how cooked they are. To test them for doneness, cut into them with a knife halfway and look inside – they should still be a tad translucent when you remove them off the heat even if you prefer your fish well-done. To check whole fish, dig into its thickest part with a fork. If the flesh looks opaque, the fish is done.
Remove the fish with a fork and a spatula. To remove the fish from the grill, dislodge it with a fork like you do when turning it. Then lift one side of fillet or whole fish barely off the grill, slip a spatula underneath, and lift the fish off the grill.
Glaze only after a brief sear on both sides. If you want to cover your fish with a glaze or a sauce, first grill it plain on very high heat for 2 minutes per side. Then turn down the heat to the lowest setting, brush with glaze and continue cooking on both sides until done.
